Dynamic, Noise Free, Screen Space Diffuse Global Illumination
Getting Dynamic Real-Time diffuse global illumination is still an open problem. Recent developments by McGuire et al.[1] and Lumen in Unreal Engine 5 seem to provide believable real time global illumination. However these methods are very expensive and cannot support lower or even mid ranged hardware, or do so with significant performance costs. Even so, we have seen both of these technologies in action, Metro Exodus: Enhanced Edition used a version of the DDGI solution and the UE5 demos “Lumen in the land of Nanite” and “The Matrix Awakens” both ran Lumen alongside their fantastic micropolygon geomtry solution Nanite[2].
In this post I want to take a step back and talk about an implementation which doesn’t require specialized hardware for raytracing, and instead uses a screen-space solution to generate fast real-time indirect lighting, whilst also tries to minimize the noise.
Dynamic Screen Space Global Illumination
I decided to use screen space ray tracing in order to capture the real time diffuse lighting of the scene. In environments that permit ray tracing such as movies or games running or very high end GPUs, each frame rays are sent from the object in random directions within the cosine weighted hemisphere oriented along the normal of the object. These rays capture scene light whenever they hit something are appropriately weighted and added to the lighting of the object giving it more realistic lighting within an environment. For this algorithm I will be using the same concept, but instead of tracing the rays against the entire scene I will only be doing so in screen space, that is, whatever is visible on the scene. This algorithm is implemented in multiple steps.
Step 1 - Generating Stochastic Normals
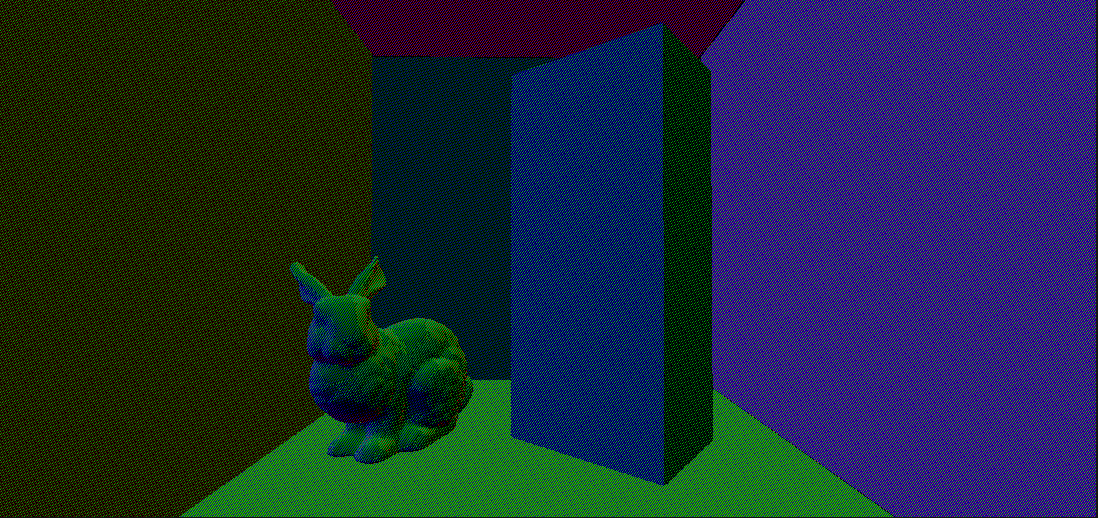
The first step is to get the direction in which we would like to trace the rays. Since we need to render this algorithm in real time, we can only afford one ray per pixel instead of the thousands that would be required to get a noise free result. To get the directions, we start with the normal buffer. This can either be created during the GBuffer creation pass or can be computed using pixel derivatives in using the depth buffer as shown in [3]. Once we have the normals we want to generate a direction in the cosine weighted hemishphere oriented along it (See appendix for all the code/pseudocode implementations). Once we have this direction we store it in a 2D texture which should look something like this (note, I am using Interleaved Gradient Noise for the directions since it works well with TAA).
Step 2 - Screen Space RayMarching
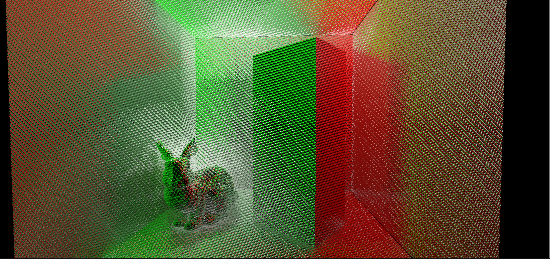
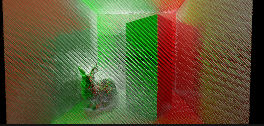
The second step is actually tracing the rays and screen space and accumulating the diffuse lighting in the scene. In this pass we will start from the world position of the fragment, either from the GBuffer or can be reconstructed from the depth buffer using the inverse of the view projection matrix. There are plenty of raymarching techniques so naturally I went for the simplest one :). I find the ray start from the screen position in screen space. The ray direction is direction that we get from the previous pass. That direction is multiplied by the view matrix and then the projection matrix to get the ray dir in screen space. Then we march the ray based on arbitrary step size of our chosing(newPos = raystart+rayDir*step) and the check the depth buffer at the new position. If the depth of the sample is less that the depth buffer value at that position, that means we have a hit and we store the sample position and a mask that tells us if we couldn’t find a hit. We use this sample position to sample the color of the scene at that location which we get from the previous frame, and will be our diffuse lighting source. Using the above normals the diffuse lighting should look something like this.
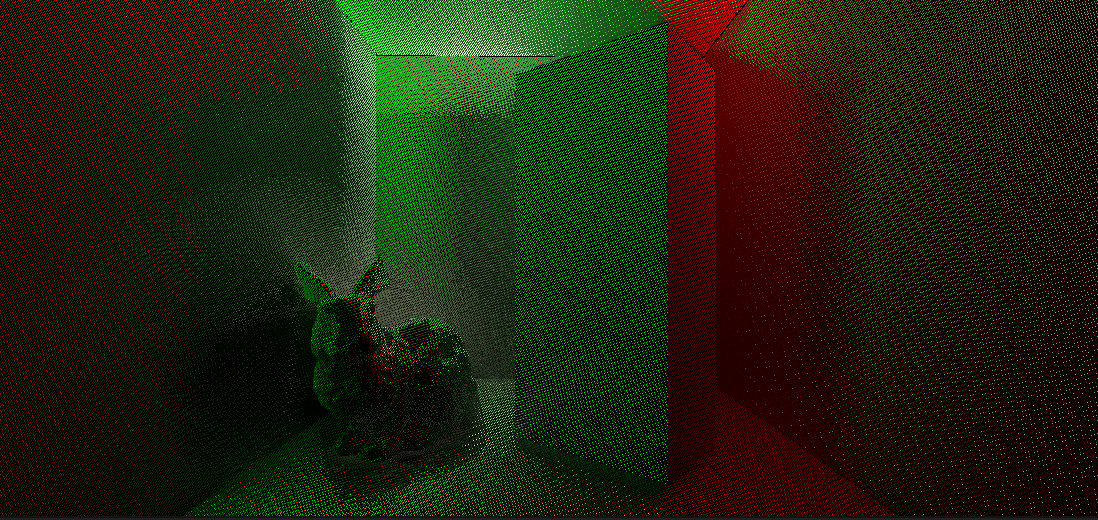
The lighting is very noisy but we will denoise in the next step.
Step 3 - Denoising The Results
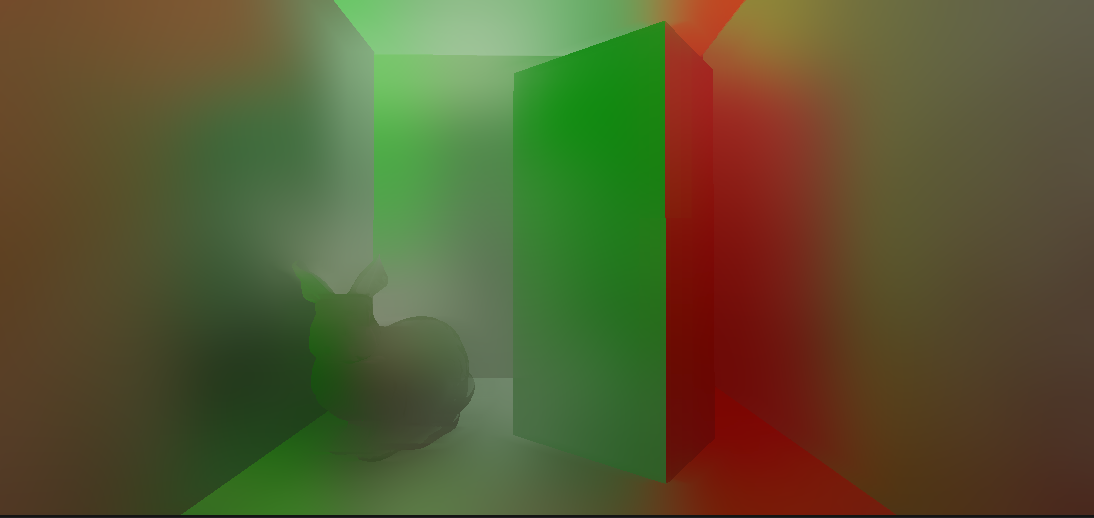
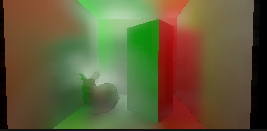
In the third step we need to denoise the result. The process involves blurring the texture until the noise is gone, however, just blurring will produce a lot of artifacts. We will first downsample the image to one-fourth of the size using a bilinear filter. Then we will successively upscale this image back to its original size, while also doing a blur in each step. However a gaussian filter is unaware of the depth and normals of the surface and therefore produces blurring along the edges of the objects which is not desirable. Instead we used something called a bilateral filter which takes into account the depth and the normal of the sample in order to avoid blurring over edges. In the end after the image has been blurred, we temporarily accumulate the texture by doing an exponential average of this frame’s results with the last frame in order to remove any lingering noise and remove the jagged edges (Please take a look at the appendix to see the different steps of the denoiser). The final denoised frame should look like this.
Step 4 - Adding the Lighting
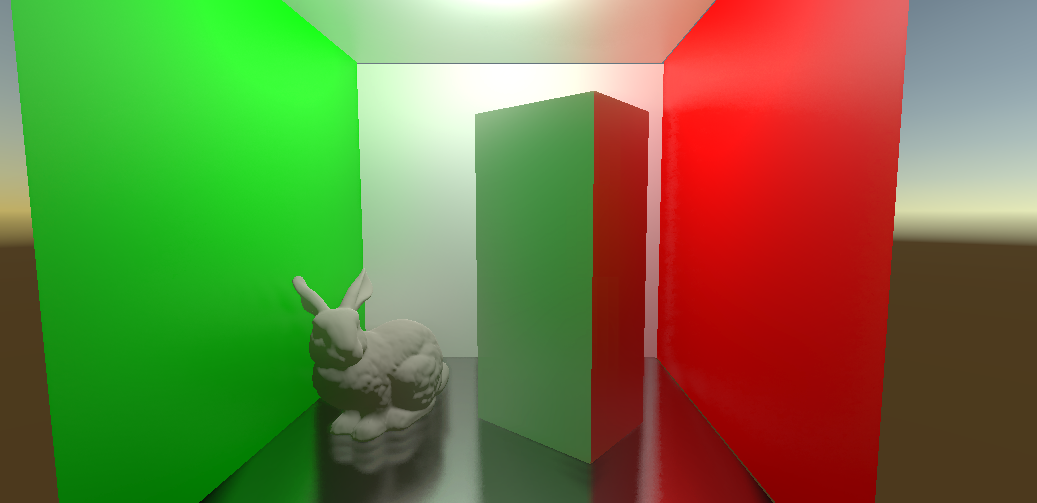
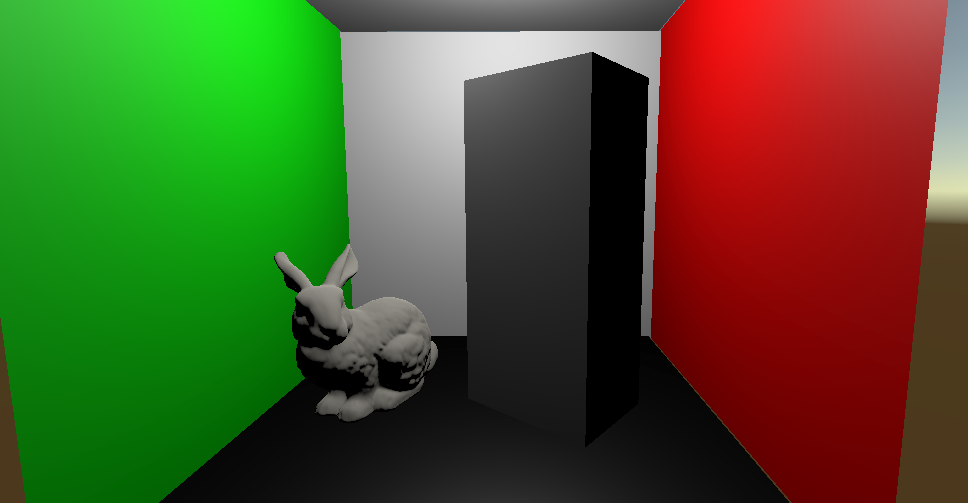
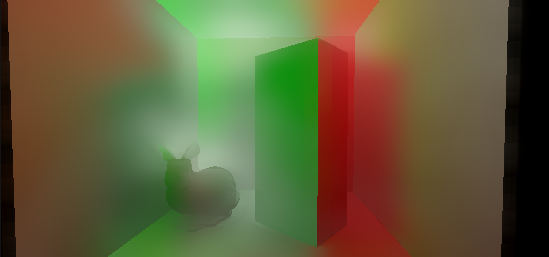
The fourth step is the most straightforward step. In the the final lighting pass we add the diffuse indirect lighting to hte direct lighting of the scene. We need to make sure that we multiply the diffuse indirect lighting with the albedo of the object we are shading, in accordance with the rendering equation. The final color of the scene should look something like this.
For reference, this is the scene without any indirect lighting applied.
Here is a video of this algorithm running in real time. The indirect lighting is changing in real time without the need to rebake lighting probes. (Pardon the Twitter compression)
Final Thoughts
Overall, I am very happy with my progress so far and the results have been promising. I would however like to make some improvements, especially in how my algorithm handles off screen lighting. Currently I am falling back to the statically baked cubemap in case we can’t find any hits in the raymarching. I would instead like to dynamically update my cubemaps each frame (perhaps one frame at a time), and even store depth values to handle things like ambient occlusion. But that will come in the future. For now I think these results are an acceptable starting point for a more production ready solution.
References
- Dynamic Diffuse Global Illumination
- Lumen in Unreal Engine 5
- Getting better normals from depth buffer
- Bilateral Blur Example From Frank Luna
Appendix A - Generating Stochastic Normals
// Get a cosine-weighted random vector centered around a specified normal direction.
float3 GetCosHemisphereSample(float rand1, float rand2, float3 hitNorm)
{
	// Get 2 random numbers to select our sample with
	float2 randVal = float2(rand1, rand2);

	// Cosine weighted hemisphere sample from RNG
	float3 bitangent = GetPerpendicularVector(hitNorm);
	float3 tangent = cross(bitangent, hitNorm);
	float r = sqrt(randVal.x);
	float phi = 2.0f * 3.14159265f * randVal.y;

	// Get our cosine-weighted hemisphere lobe sample direction
	return tangent * (r * cos(phi).x) + bitangent * (r * sin(phi)) + hitNorm.xyz * sqrt(max(0.0, 1.0f - randVal.x));
}
	float4 CreateCustomNormals(VertexOutput i) : SV_Target
	{
		float2 uv = i.uv;
		int2 pos = uv * screenResolution.xy;

		float4 worldNormal = GetNormal(uv);
		float normalLength = length(worldNormal);

		float noise = IGN(pos.x,pos.y, frameCount); //Animated Interleaved Gradint Noise
		float3 stochasticNormal = GetCosHemisphereSample(noise, noise, worldNormal);

		return normalize(float4(stochasticNormal,1));
	}
Appendix B - Getting the Diffuse Lightingn
	float4 RayCastDiffuse(VertexOutput i):SV_Target
	{
		float2 uv = i.uv;
		int2 pos = uv


		float depth = GetDepth(depthBuffer, uv);
		float3 screenPos = float3(uv.xy * 2 - 1, depth);

		float3 worldPos = GetWorlPos(screenPos);
		float3 viewDir = stochasticNormalTex.Sample(sampleColor, uv);


		float3 viewPos = GetViewPos(screenPos);

		float2 jitter = blueNoise.Sample(basicSampler, uv);

		float3 dir = normalize(mul(viewDir, viewMatrix));

		jitter += 0.5f;

		float stepSize = (1.0 / (float)stepCount);
		stepSize = stepSize * (jitter.x + jitter.y) + stepSize;

		float rayMask = 0.0;
		float4 rayTrace = RayMarch(depthBuffer, projectionMatrix, dir, stepCount, viewPos, screenPos, uv, stepSize, 1.0);

		float2 hitUV = rayTrace.xy;
		rayMask = rayTrace.w;
		float4 sampleColor = float4(0.0, 0.0, 0.0, 1.0);
		float3 cubemap = GetCubeMap(hitUV);
		sampleColor.rgb = sourceColor.Sample(basicSampler, hitUV);
		sampleColor.rgb = lerp(cubemap, sampleColor.rgb, rayMask);

		return sampleColor;
	}
Appendix C - Denoising Steps
This is the different denoising steps that I took to reach the final image. I am using a bilateral blur (see [4]).
Downsample Step 1 (Half Res)
Downsample Step 2 (Quarter Res)
Filtering the quarter res image
Upsampling and Blurring to get the Half Res Image
Upsampling again and temporally accumulating to get the final image